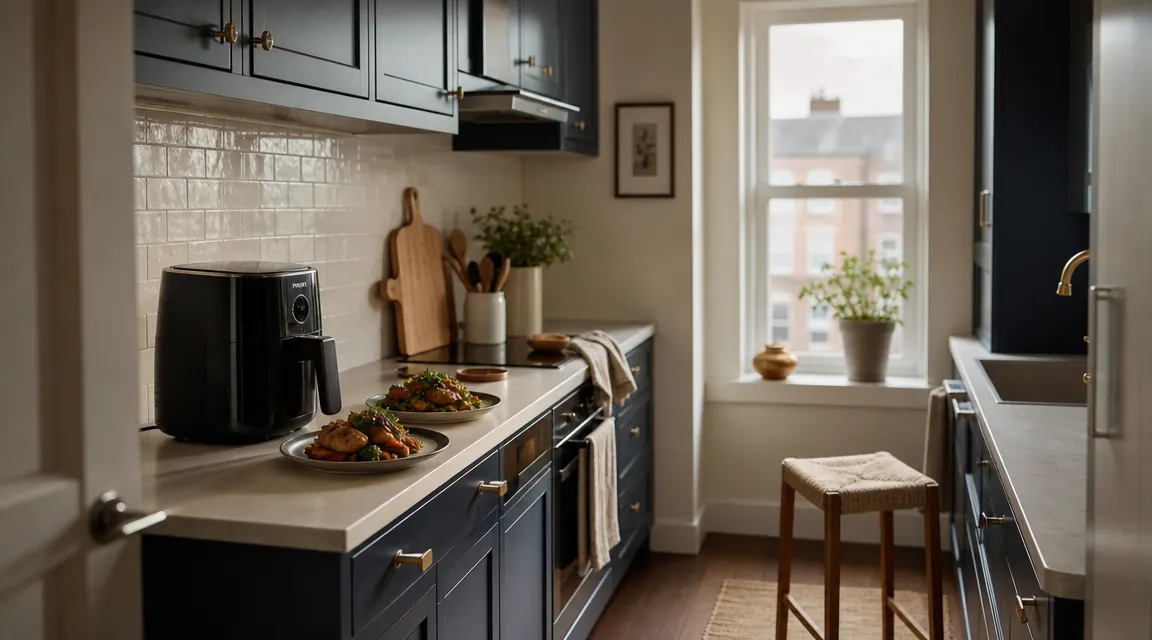
The real problem with cooking in a small kitchen isn't the air fryer. It's not even the counter space. It's not knowing the sequence. Most people treat a compact air fryer like a gadget for frozen fries, then wonder why they're still ordering delivery on Wednesday nights. The truth is that a 4-quart air fryer can carry a full weeknight dinner for one or two people, start to finish, if you plan the order of operations before you open the fridge. I've been doing exactly this in a 380-square-foot apartment in Seattle for the past year, and this guide covers every step I learned, including the mistakes that wasted ingredients before I figured out the right flow.
The air fryer I use is the Ninja AF101, a 4-quart model that fits in a 13.4 by 10.75 inch footprint. It handles everything from a single salmon fillet to a full sheet of roasted broccoli. If you want to read more about how it performs over months of daily use, check the full review linked at the bottom of this guide. For now, let's walk through the method.
Cooking full meals starts with having the right 4-quart model for a compact counter.
The Ninja AF101 fits under most upper cabinets, heats to 400F in under 3 minutes, and handles proteins, vegetables, and reheating in a single basket. Over 90,000 reviewers on Amazon agree it earns its counter space.
Amazon Check Today's Price on Amazon →Step 1: Plan Your Meal Around One Heat Zone
Before you touch the fridge, decide on a single temperature for the entire meal. This sounds limiting, but it actually opens things up. Most proteins cook well between 375F and 400F. Most vegetables roast at the same range. When everything in your meal shares a heat zone, you can cook the protein first, pull it to rest, then drop the vegetables in the same basket without adjusting the dial. You are building a one-queue system, not two separate cooking sessions.
If you're cooking for two, pick one protein and two vegetables that all work at 390F. Chicken breast, broccoli, and asparagus is a clean example. Salmon, zucchini, and snap peas is another. Write down your three ingredients before you shop, because small-kitchen cooking rewards planning more than it rewards improvisation.
The one exception is starchy sides. Brown rice or farro needs a stovetop or rice cooker. Air fryers don't do grains well. Plan a grain side that you can set on a burner before you start the air fryer, so both finish at roughly the same time.
Step 2: Set Up Your Prep Zone Before You Preheat
In a small kitchen, the prep zone and the cooking zone are often the same 18 inches of counter. The fix is to use a cutting board that bridges the sink. Most apartment sinks have a lip that a standard 12-by-18-inch board can span, giving you a prep surface over dead space. Mise en place, meaning everything cut and seasoned before the machine turns on, is not just a restaurant concept. It's a small-kitchen survival skill.
Season your protein in the basket liner itself, or in the basket directly, so you're not dirtying a second bowl. Toss your vegetables in the same bowl you mixed your spice blend in, then set them aside on a plate. Preheat the air fryer to 390F while you finish the last prep step. The Ninja AF101 reaches temperature in about 3 minutes, so you lose nothing by preheating early.
Keep a small bowl near the machine for scraps and a damp paper towel folded on the corner of the counter. Wiping the basket rim as you cook keeps drips from becoming baked-on residue by the time you clean up.
Step 3: Cook Your Protein First, Then Rest It
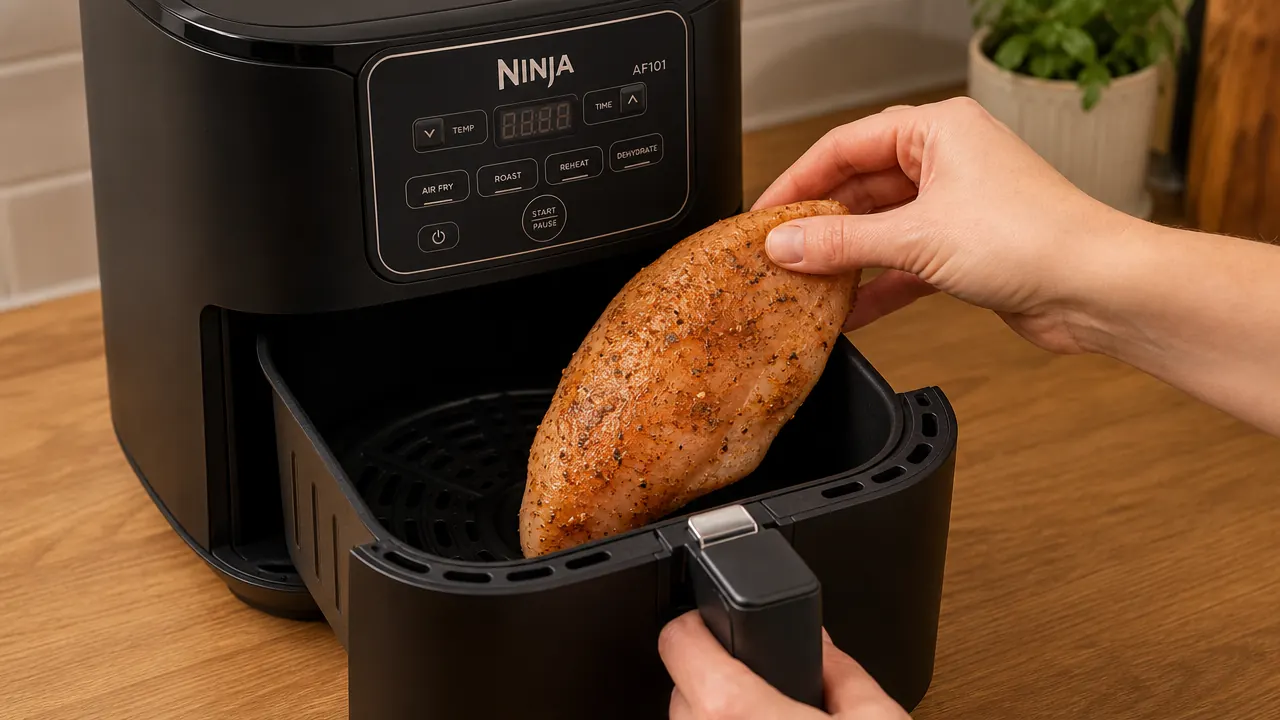
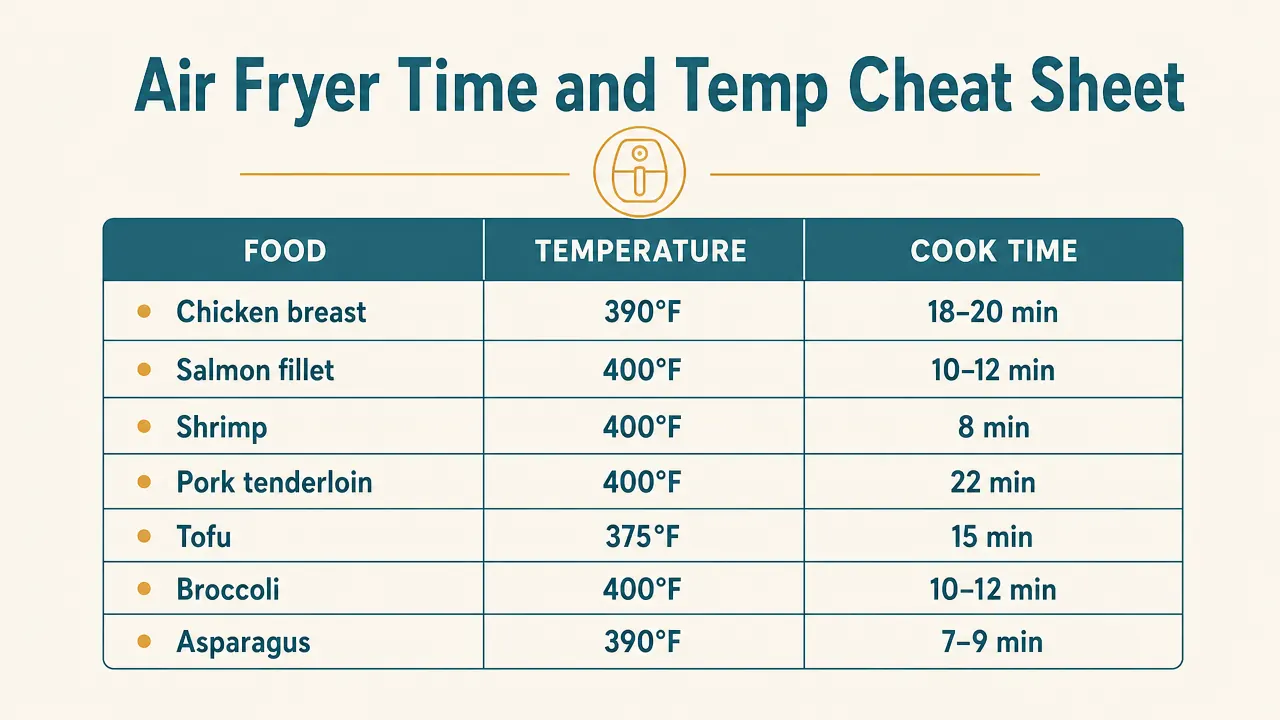
Protein goes in first because it takes the most time and benefits from resting. A 6-ounce boneless chicken breast at 390F takes about 18 to 20 minutes, flipping once at the halfway point. Salmon fillets at 400F take 10 to 12 minutes and don't need flipping. Shrimp, which is my fastest weeknight option, takes 8 minutes at 400F and comes out with crisp edges and a clean center.
Pull the protein when it hits temperature, set it on a small cutting board or plate on the stove surface, and tent it loosely with foil. It will hold heat for 5 to 7 minutes, which is exactly the window you need to cook your vegetables. Use a simple instant-read thermometer. Chicken at 165F, salmon at 125F to 130F for medium, pork loin at 145F. Guessing wastes ingredients in any kitchen.
Cook protein first, rest it under foil, then run vegetables in the same basket. You get a complete meal from one machine in under 30 minutes, start to finish.
Step 4: Run Your Vegetables in the Cleared Basket
Once the protein is resting, check the basket. If there's rendered fat sitting in the bottom, tip it out over a trash can or a small bowl, not the sink. Fat poured down a drain is a slow plumbing problem you don't want in a rental. Give the basket a quick wipe if there's heavy residue, or just leave it and add the vegetables directly. A little leftover seasoning from the protein adds flavor.
Dense vegetables like broccoli florets, sliced carrots, or cauliflower need 10 to 12 minutes at 400F, shaken at the halfway point. Thinner vegetables like asparagus, snap peas, or zucchini rounds take 6 to 8 minutes. If you're doing a mixed batch with varying densities, cut denser pieces smaller so they finish at the same time as the softer ones. This matters more in an air fryer than in a conventional oven because the hot-air flow is concentrated and uneven cooking happens fast.
Don't crowd the basket. A packed basket will steam instead of roast, and you'll lose the crunch. If you have more vegetables than fit in a single layer, cook in two small batches, 5 minutes each, rather than one overloaded batch. This adds 5 minutes to your total cook time but produces genuinely better results.

Step 5: Plate Efficiently and Clean While You Eat
By the time the vegetables finish, your grain side should be done or nearly done. Slice the rested protein against the grain, plate it next to the vegetables, and add the grain. You've cooked a complete dinner in 30 to 35 minutes using one air fryer, one small pot, and a single cutting board.
While dinner is still warm, fill the air fryer basket and pan with hot water and a drop of dish soap and let them soak. A 10-minute soak while you eat loosens everything. The Ninja AF101's basket and crisper plate are dishwasher-safe, but soaking and a soft sponge takes 90 seconds and keeps the nonstick coating in better shape over time. Wipe the interior cavity with a damp paper towel after every few uses to prevent grease buildup near the heating element.
What Else Helps: The Supporting Gear That Makes This Work
The air fryer is the engine, but a few tools make the whole system smoother. An instant-read thermometer eliminates guessing on protein doneness and costs about ten dollars. A splatter screen placed loosely over the air fryer vent reduces mess on the counter. A small trivet or silicone mat between the machine and the cabinet below protects both surfaces. If you're cooking for two regularly, a second small oven-safe pan lets you keep one portion warm while you plate the other.
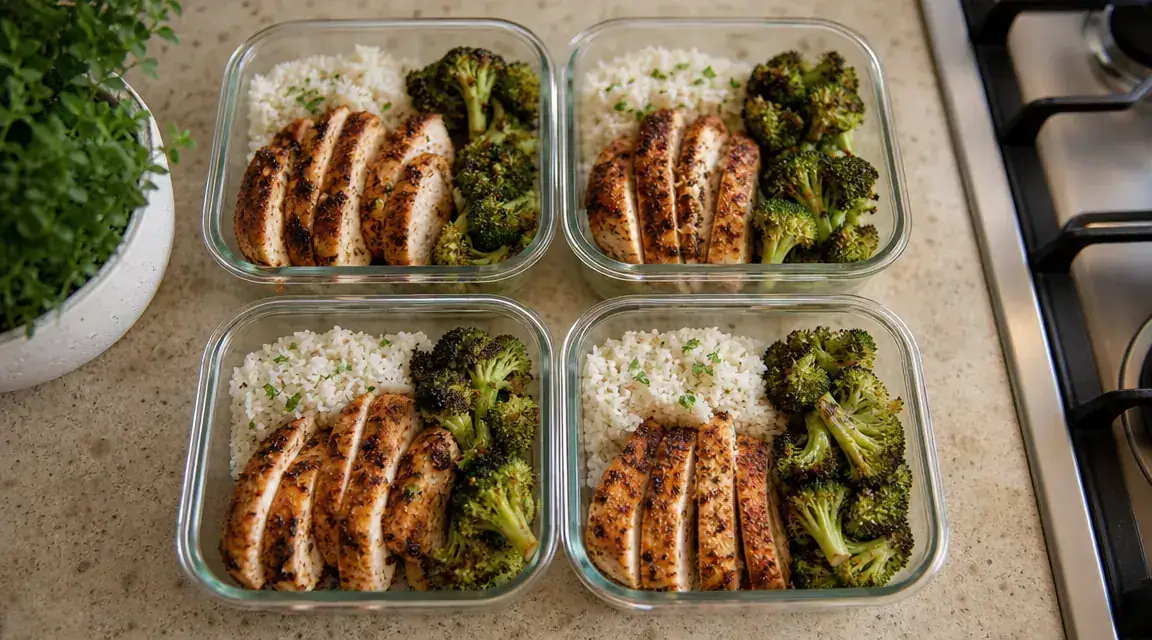
For batch cooking, the air fryer handles meal prep as well as it handles single dinners. I run two chicken breasts and a full basket of broccoli on Sunday afternoon, then portion them into glass containers for Monday and Tuesday lunches. Reheating leftovers in the air fryer at 350F for 3 to 4 minutes brings everything back to near-original texture, which a microwave never does for roasted vegetables. That reheating ability is one of the strongest arguments for using an air fryer as a primary cooking tool in a small kitchen.
One thing to know about cooking in a compact kitchen with any high-wattage appliance: check your outlet. The Ninja AF101 draws 1550 watts. Running it on the same circuit as a microwave or toaster can trip a 15-amp breaker. Use a dedicated outlet when possible, or stagger your cooking so nothing shares a circuit at peak draw.
If you haven't picked an air fryer yet, the Ninja AF101 is the one I'd start with for a compact kitchen.
At a 13.4 by 10.75 inch footprint, 4-quart capacity, and four cooking functions, it fits in a small kitchen and covers the full range of meals in this guide. See what it's going for today on Amazon before deciding.
Amazon Check Today's Price on Amazon →